How to Build Your Own Spotify Wrapped with Python, Spotipy and Glide Apps
May 1, 2021What We’ll Build
We are going to create a Spotify Wrapped App that generates our top tracks over various time periods. We will build it so it updates every month instead of once a year. If you’re more of a visual learner, you can watch the YouTube tutorial here.
Tech Stack
We are going to be doing this in the Python using spotipy and gspread
We will be writing our code first in a Jupyter Notebook and then in the VS Code editor
We will be using an API keys from Spotify and Google to access user data
We will be using Glide to build our app
Requirements
- Python 3.6 or newer
- Spotify Account & API Key
- Google Account
- Glide Account
Getting Our Top Tracks
Spotify has some great documentation. Makes you think they care about their developers.
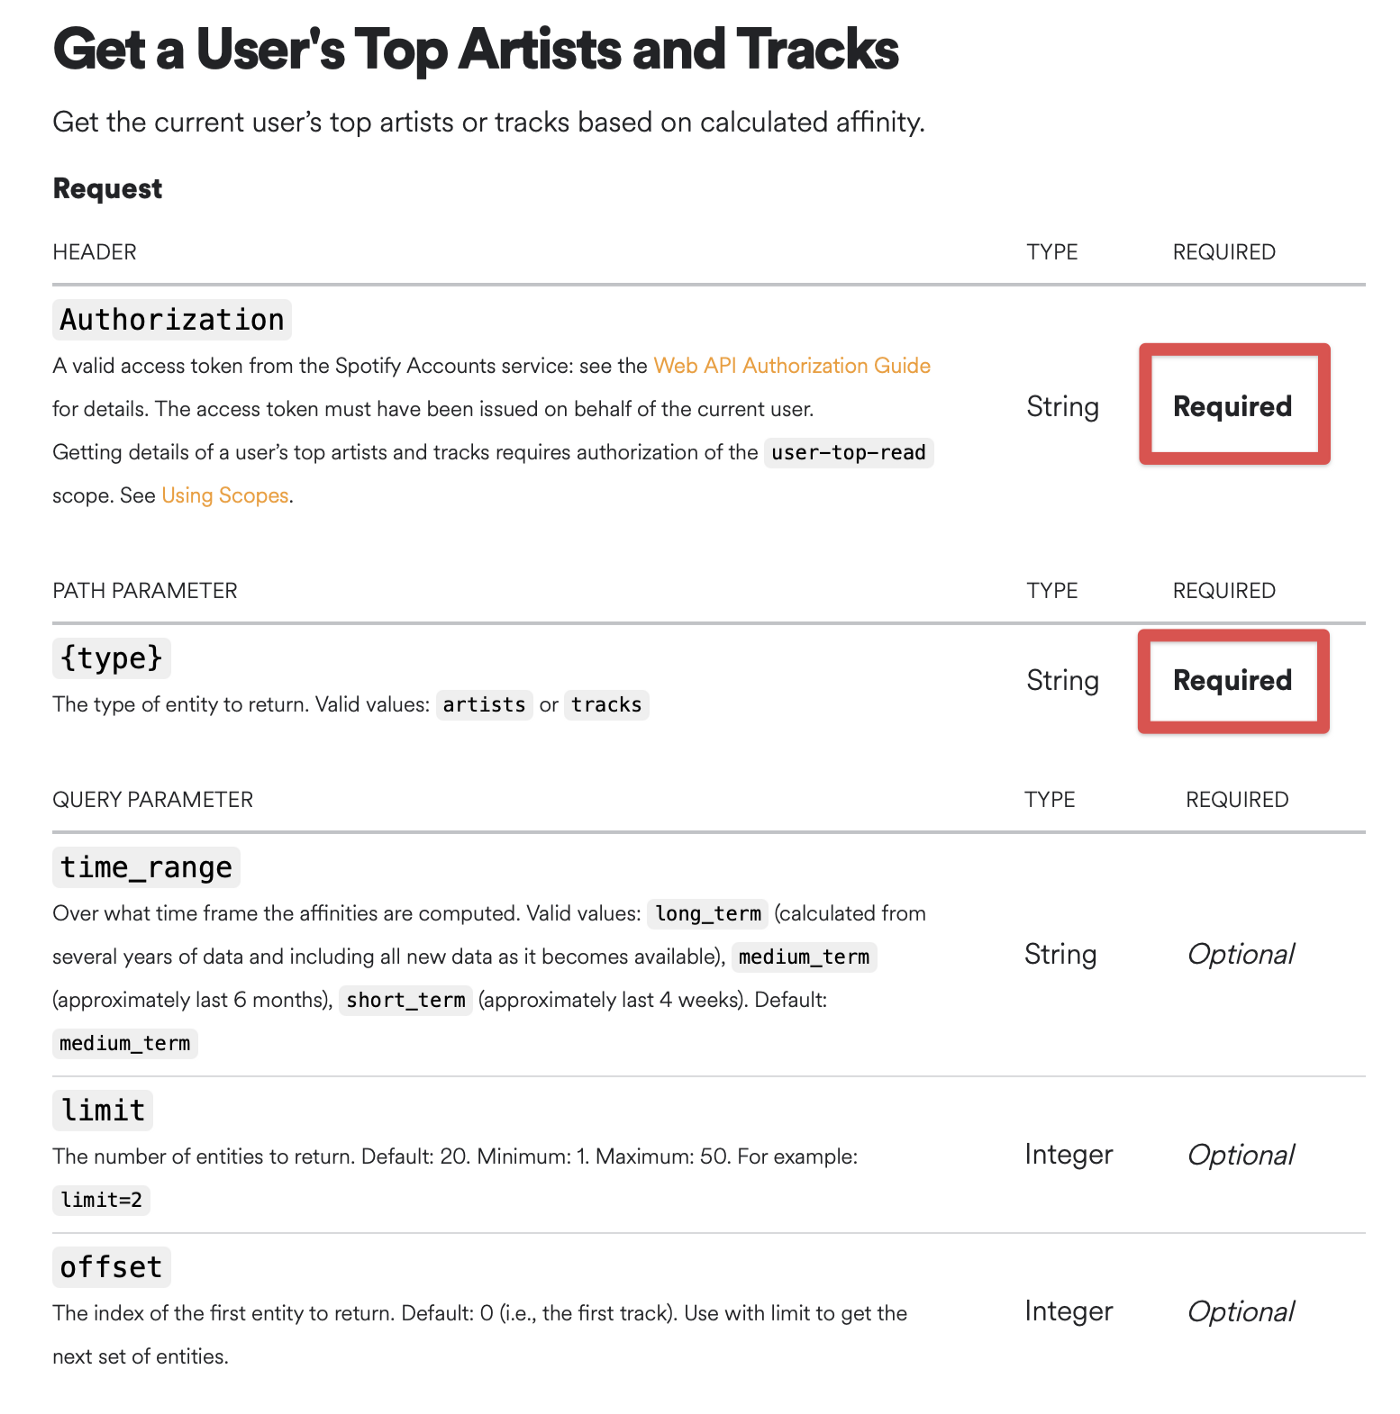
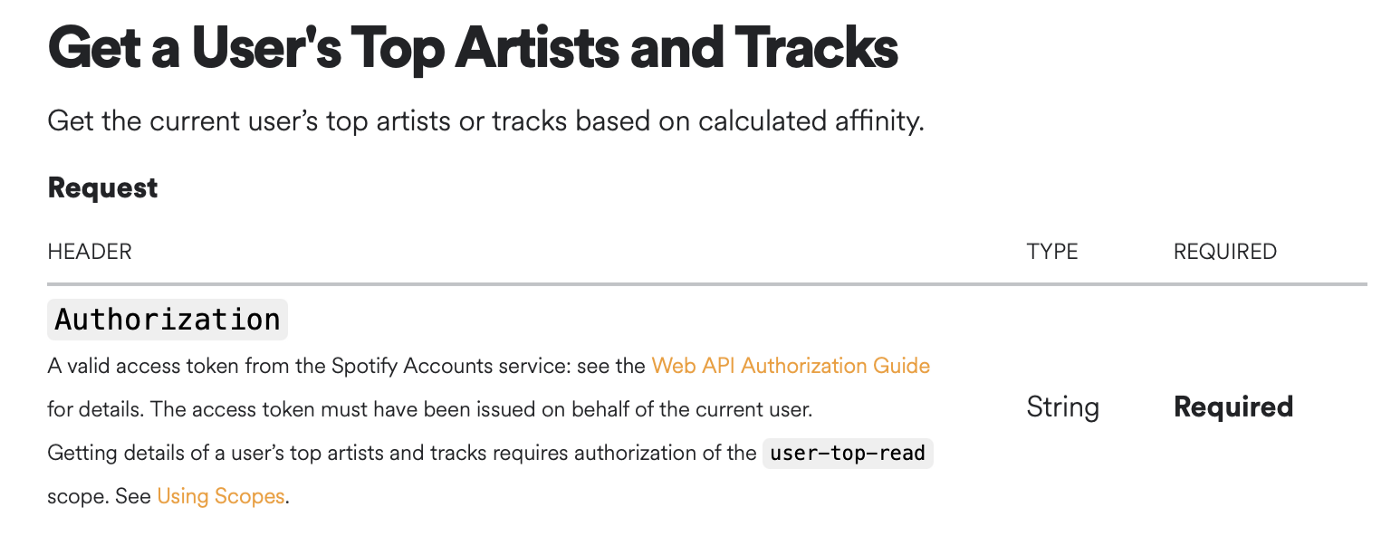
I found a very specific endpoint that is going to make our lives easy. We will use the Web API endpoint to get a user’s top artists and tracks. There is not a ton of flexibility but it’s perfect for this tutorial.
Looking at the documentation, the only two requirements are Authorization and Path Parameter.
Authorization can be tricky so let’s dive in together there.
Authorization
User Authorization is where both Spotify and the user grant us permission to read their listening data. There will be 3 parties involved in the process.
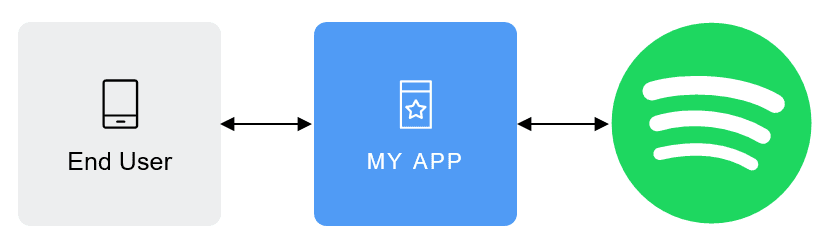
MY APP here will be our python function to get data and store it in a google sheet, instead of a standalone app.
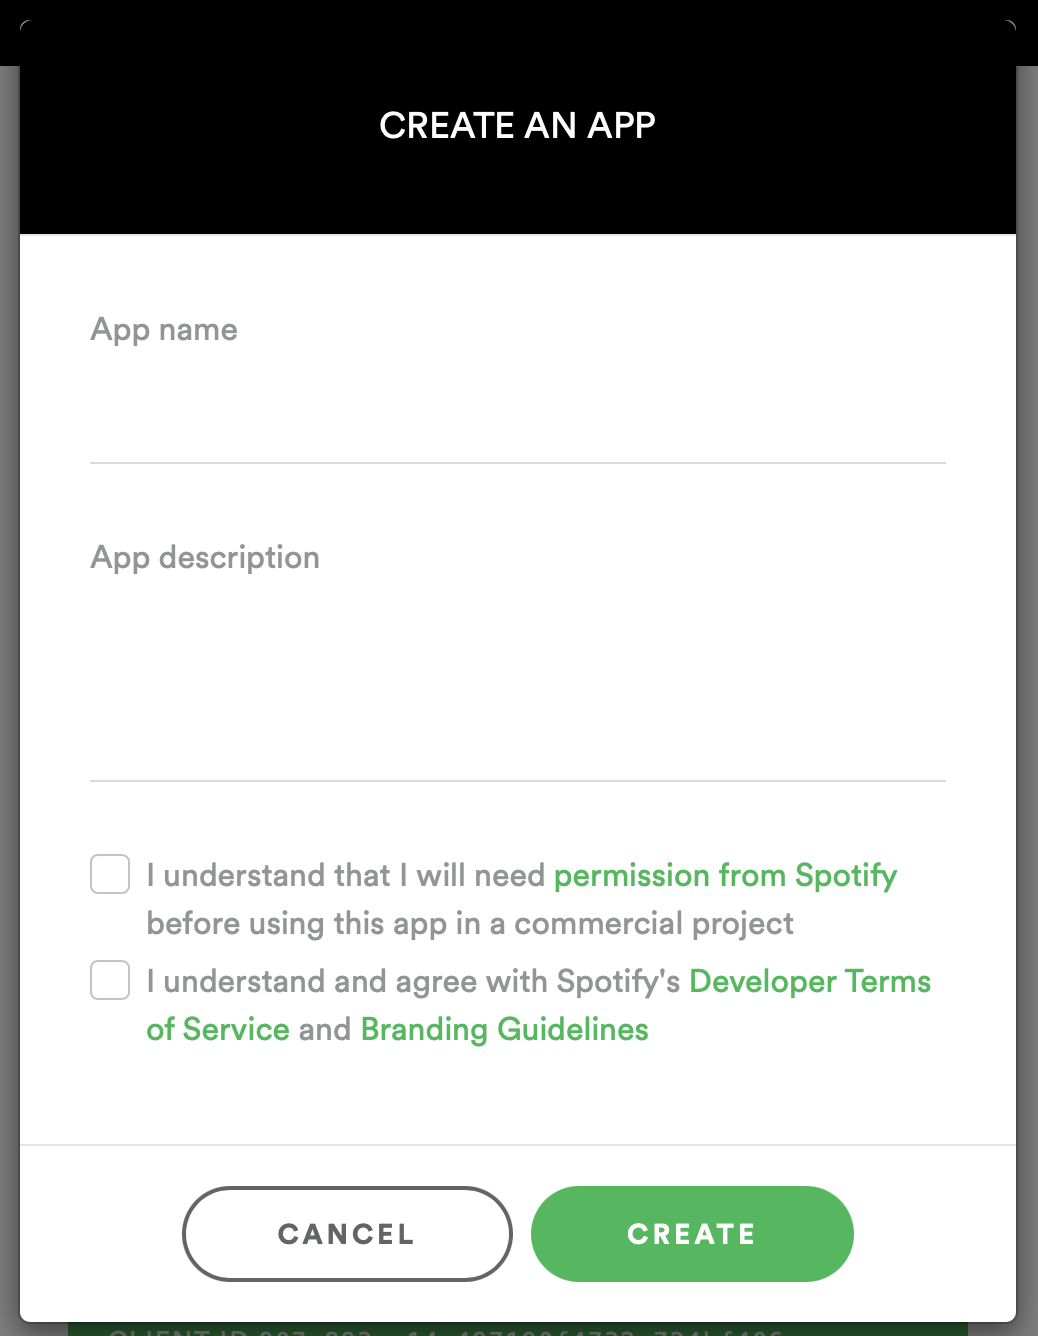
Let’s start by creating the app. First thing we need to do is register our app with Spotify. On your dashboard screen click Create An App.
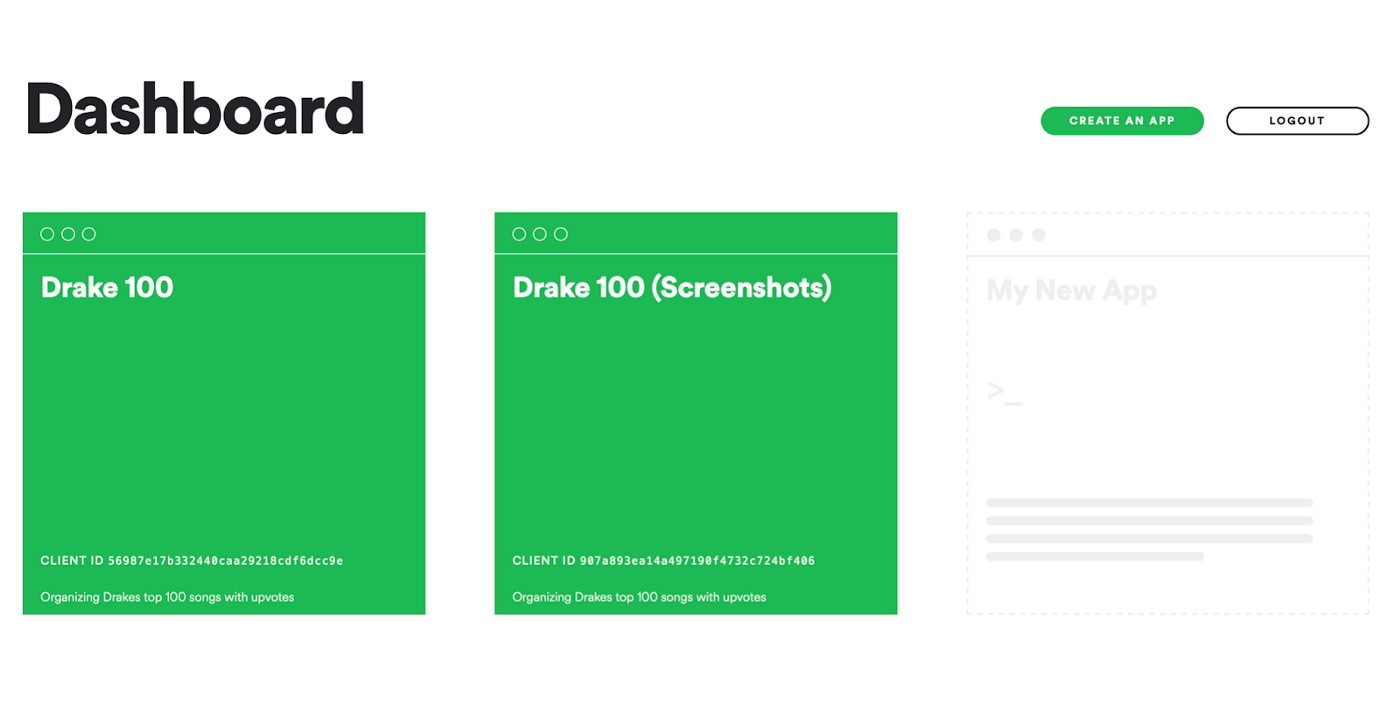
You’ll be prompted to give your app a name and description. You’ll also be asked to sign away your life to the agreement terms. I will call my app My Wrapped and give it a one line description.
After hitting Create, go to your dashboard and look for your Client IDand Client Secret. You can always reset your Client Secret if anything goes wrong. Store these in a python file for now because we will need to reference them later to authorize.
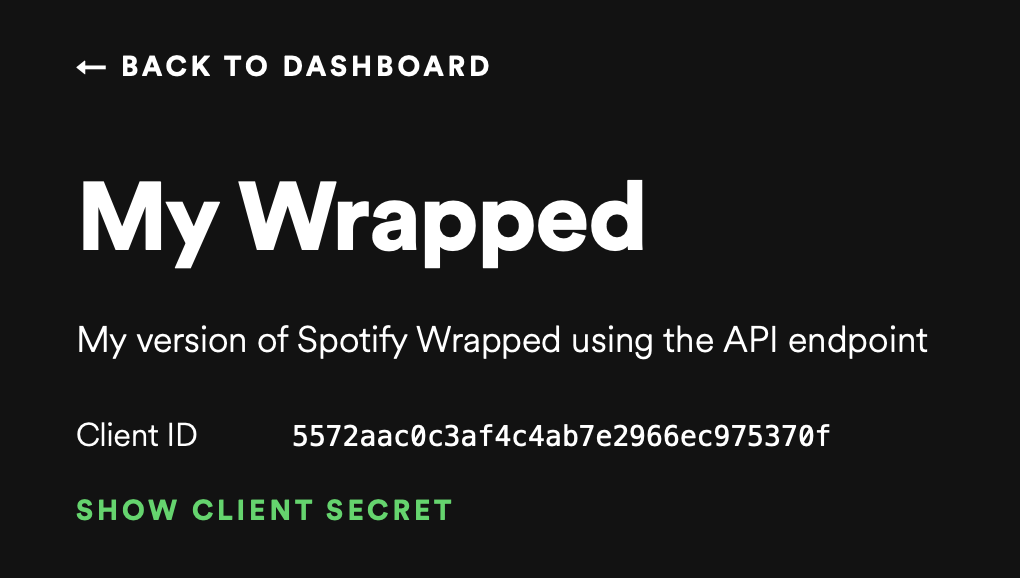
Our Client ID is a unique identifier and our Client Secret is the key that we’ll pass in to secure calls to the Spotify Web API. Again, we will likely stick these in an .env file when we upload to GitHub to make sure we don’t accidentally expose them, but for now you can drop them into a Jupyter notebook cell with the variables client_id and client_secret.
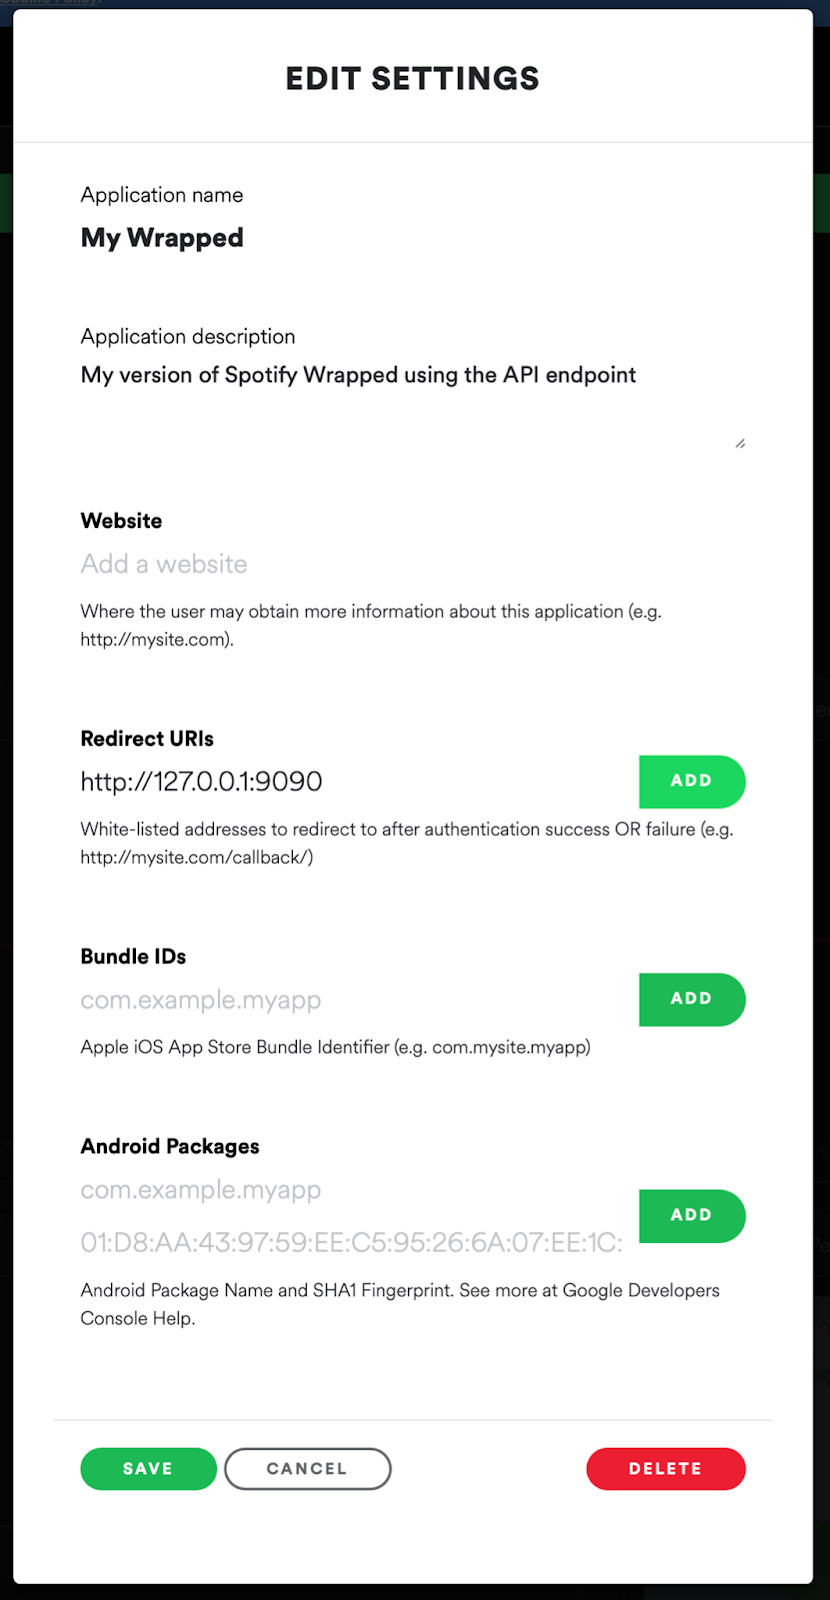
In our app settings we also need to whitelist a redirect URI. This will come in handy when authorizing our app. This URI enables the Spotify authentication service to automatically re-launch your app every time the user logs in.
Lets add http://127.0.0.1:9090 for now.
Once we have all of this information, we need to follow one of Spotify’s authorization flows to get our access token. For our needs it makes the most sense to use the Authorization Code Flow.
There are a few different approaches to take here. You can use Postman, Spotipy or the Spotify Web Console. Or, if you’re really feeling frisky, you can learn to do it yourself by watching this YouTube video (and github here).
30 Days of Python — Day 19 — The Spotify API — Python TUTORIAL
For the purposes of this tutorial, we will focus on Spotipy.
Using Spotipy
Spotipy is a lightweight Python library for the Spotify Web API. Authorization using Spotipy is pretty straightforward. First we need to make sure we have the package installed. We can do this with pip.
$ pip install spotipyThe good news is spotipy supports the Authorization Code Flow we referenced above. Spotipy provides a class SpotifyOAuth that can be used to authenticate requests.
First let’s import everything we need like so:
import requests
import spotipy
from spotipy.oauth2 import SpotifyOAuth
import pandas as pd
Next, we will want to pass in the necessary parameters to the SpotifyOAuth class. If we look at the spotipy github for auth we see the following parameters are needed:
SPOTIPY_CLIENT_ID=’your-client-id’
SPOTIPY_CLIENT_SECRET=’your-client-secret’
SPOTIPY_REDIRECT_URI=’your-redirect-uri’
SCOPE = “user-top-read”
You’ll notice in the scope I set it equal to “user-top-read”. How did I know which scope to use? Well spotify told me in their documentation
I also passed in the URI redirect that I added as a whitelist to my app settings in the Spotify developer console.
We can then run the code to initiate our sp object.
sp = spotipy.Spotify(auth_manager=SpotifyOAuth(client_id=SPOTIPY_CLIENT_ID, client_secret=SPOTIPY_CLIENT_SECRET, redirect_uri=SPOTIPY_REDIRECT_URI, scope=SCOPE))And from there lets reference the spotipy github again to see what function we should use. It looks like the current_user_top_tracks() function will get our top tracks.
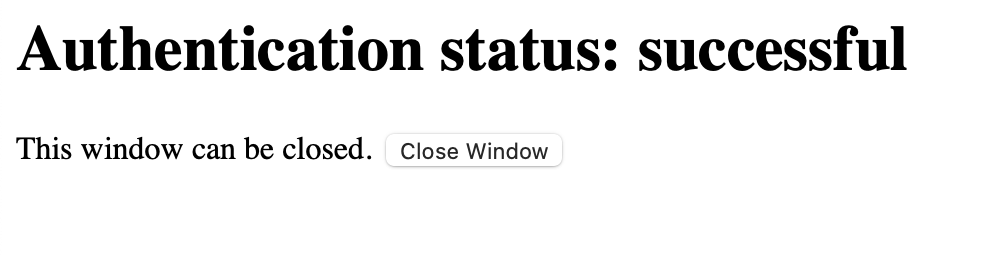
results = sp.current_user_top_tracks()Now, the first time we run this we will be prompted to authorize the app. It should have our app name at the top.
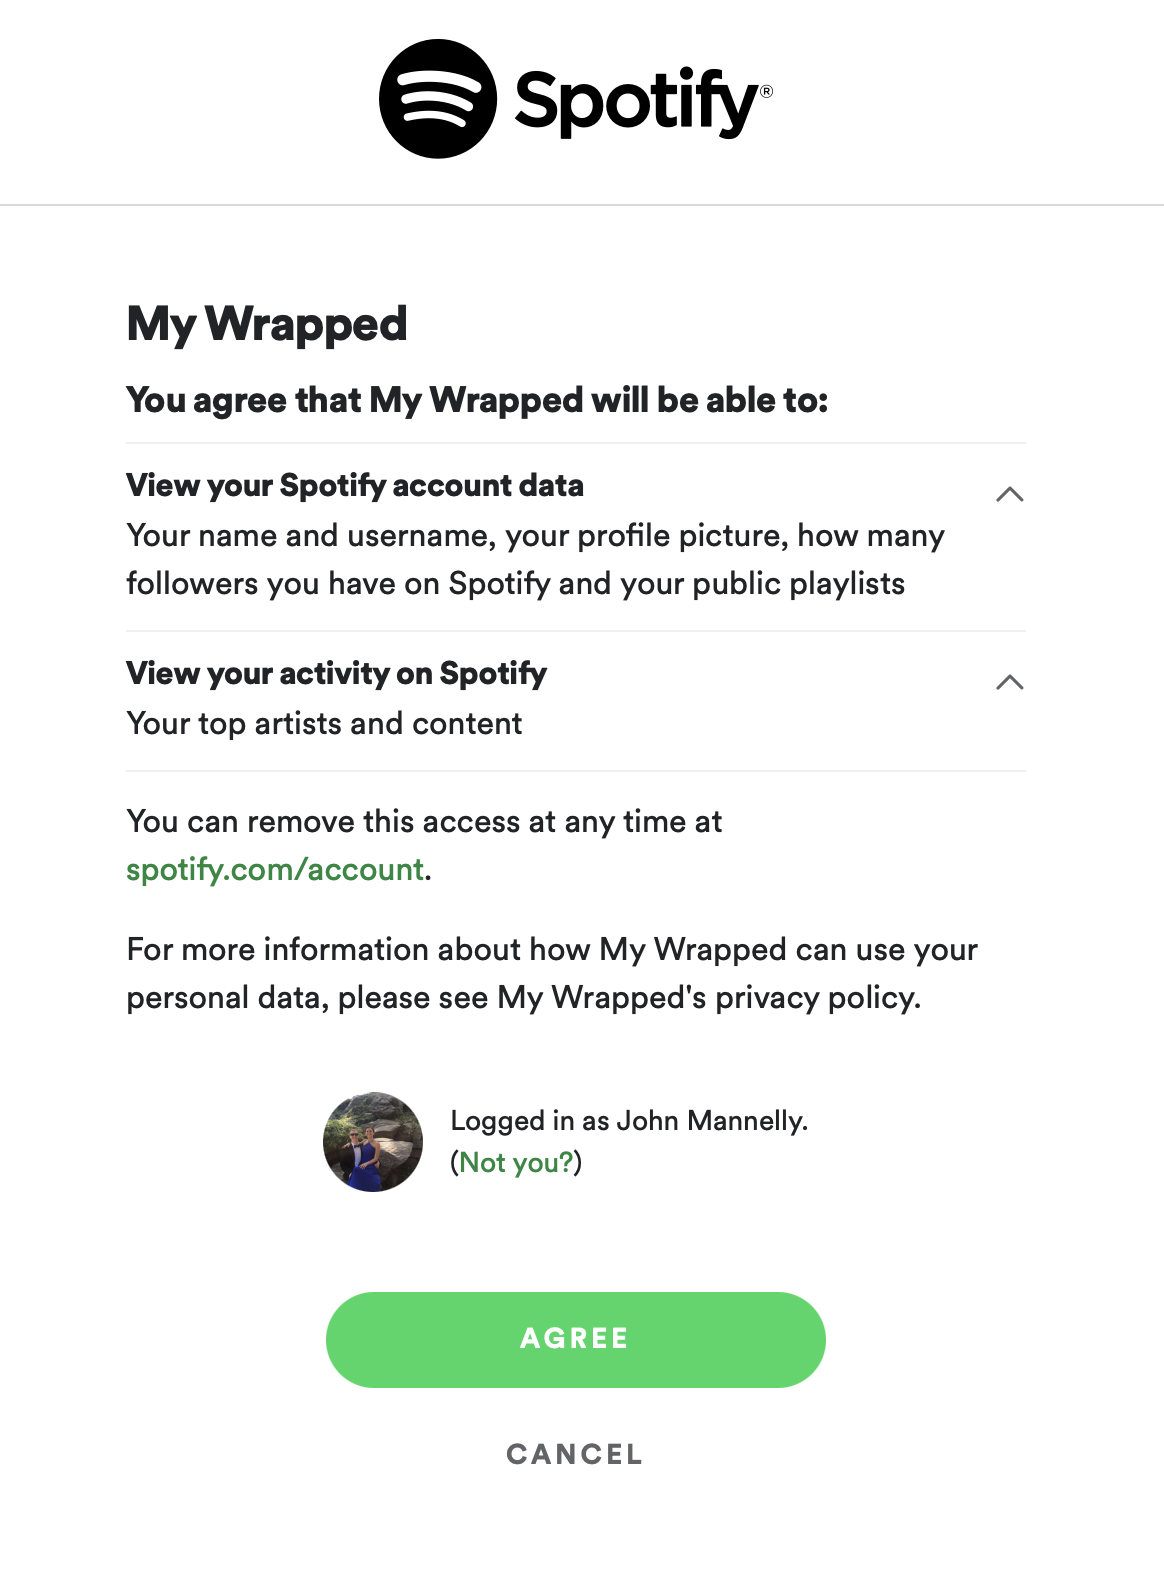
After you click agree, you will be redirected to our local environment via the URI link we provided earlier.
From there we should be all set to run our code and we can print our results.
We can also pass in certain parameters such as limit, offset and time_range to get more specific results.
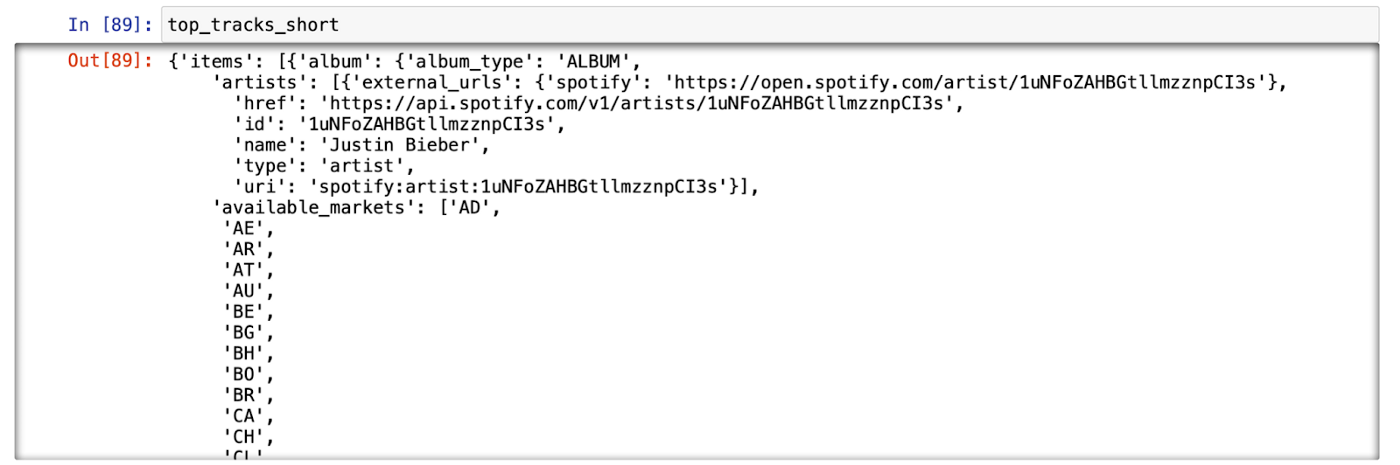
top_tracks_short = sp.current_user_top_tracks(limit=10, offset=0, time_range=”short_term”)Getting Track Information
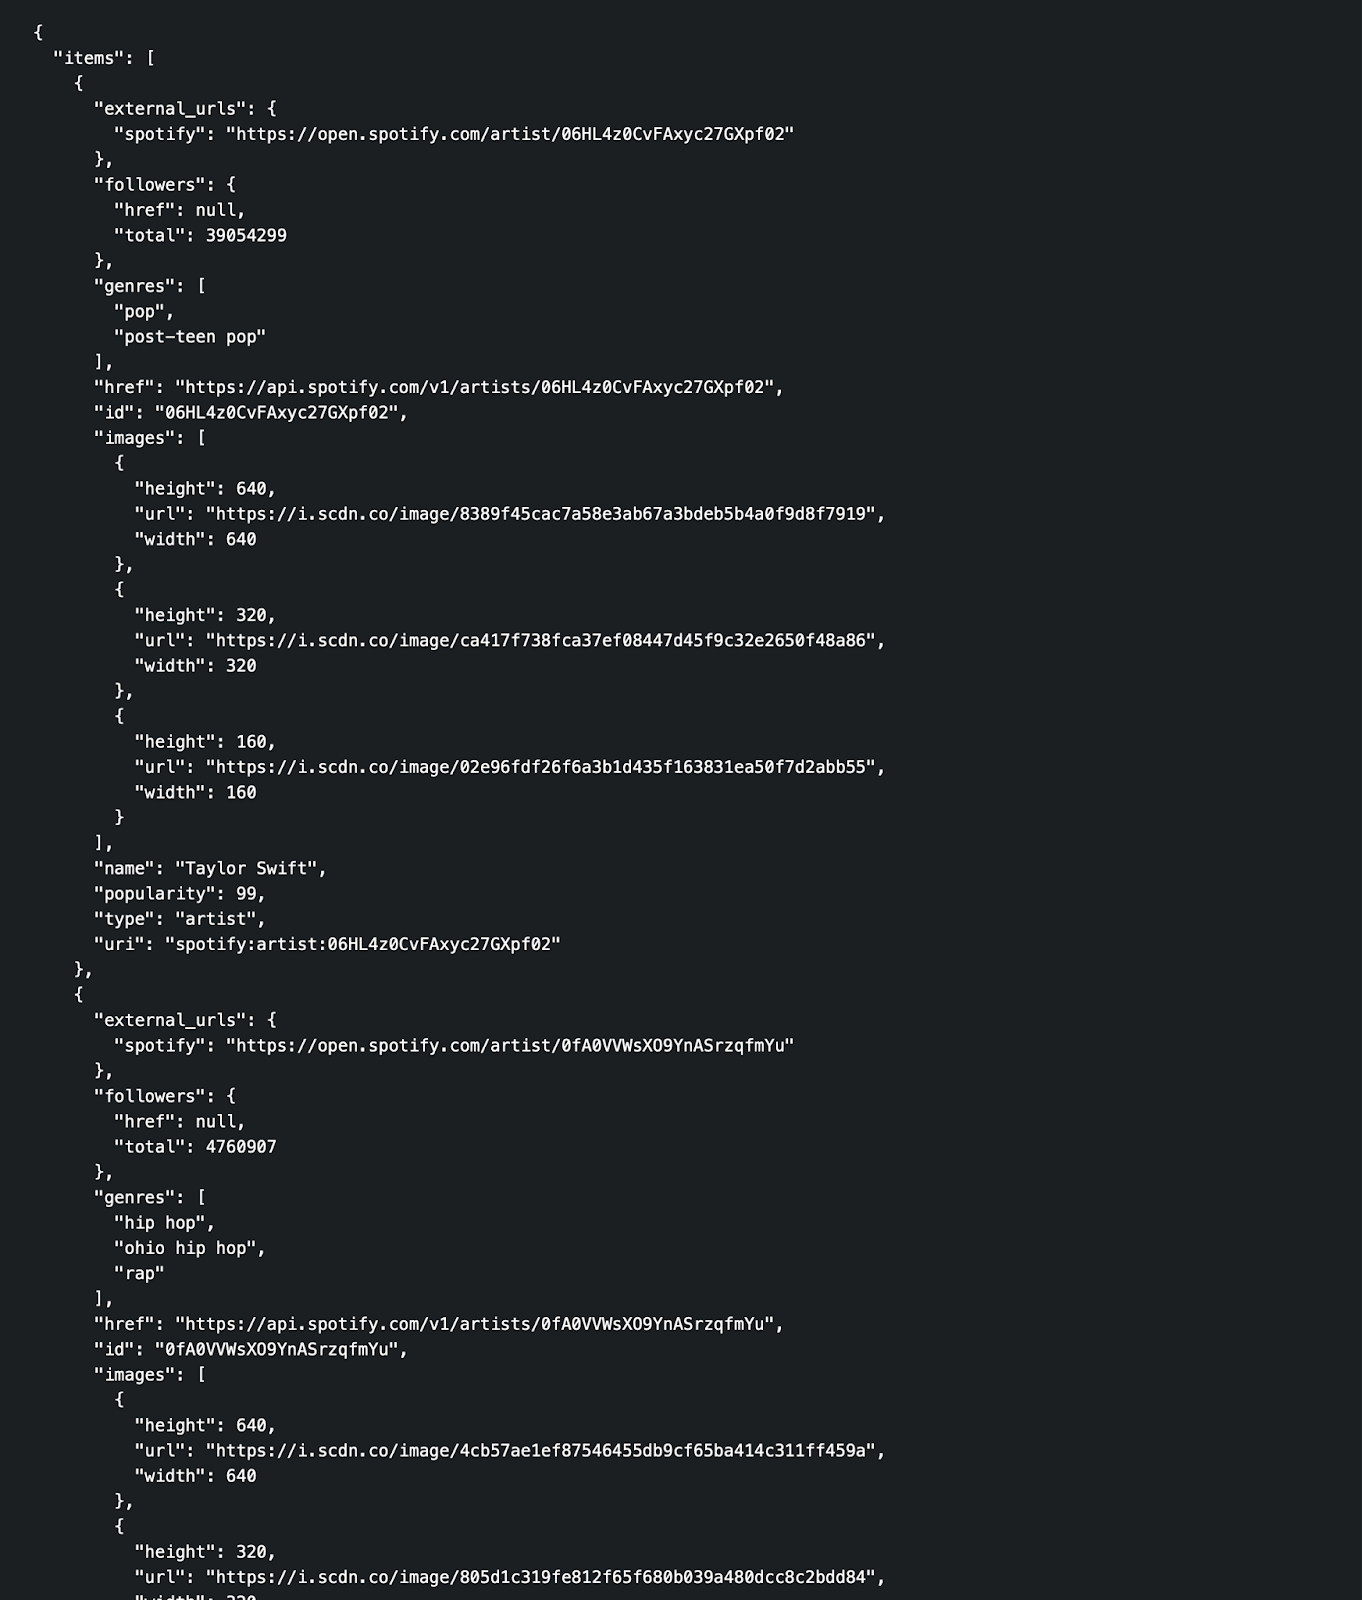
You’ll notice if we print top_tracks_short we get a long json blob.
This is great but what we are really after is specific info about a given track. To get that info we can access the nested information with the following function:
def get_track_ids(time_frame):
    track_ids = []
    for song in time_frame[‘items’]:
    track_ids.append(song[‘id’])
    return track_ids
The parameter we will pass in will be the dictionary variable that we get from the current_user_top_tracks() call we make to the Spotify API.
We will create an empty list of track_ids and then loop over the dictionary to get the track ids for each item in the dictionary. After that we can return the track ids.
Let’s run this and see what it returns.
track_ids = getTrackIDs(top_tracks_long)
track_ids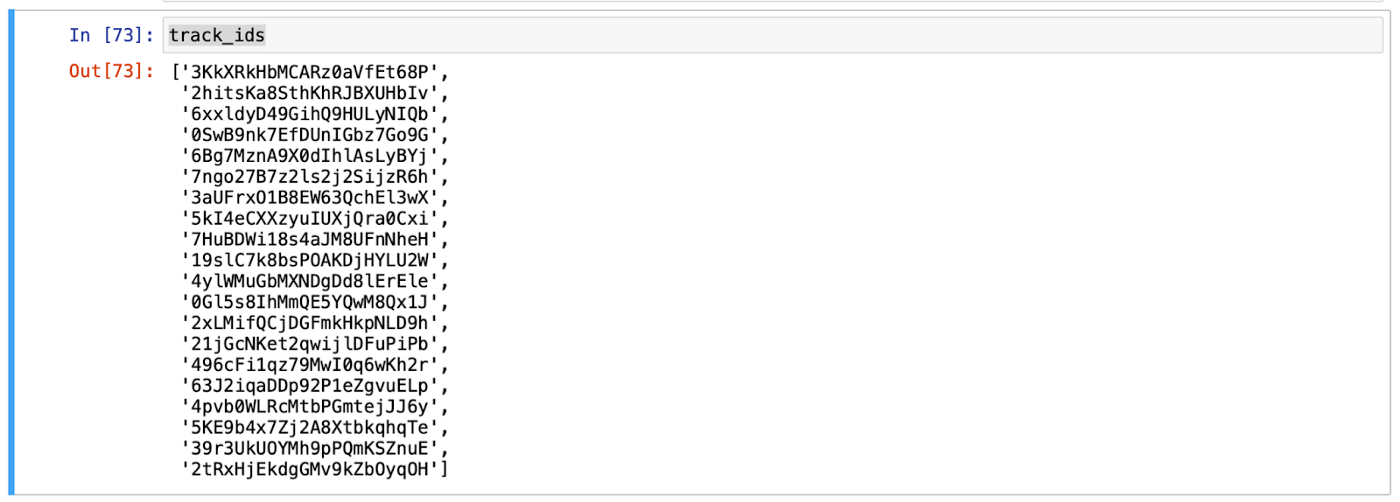
A list of Spotify track ids! Awesome. Now we need to get specific features for each of these track ids. One step at a time.
The track features will come in a similar format to the track ids. We need to access the nested information within the dictionary.
def get_track_features(id):
    meta = sp.track(id)
    # meta
    name = meta[‘name’]
    album = meta[‘album’][‘name’]
    artist = meta[‘album’][‘artists’][0][‘name’]
    spotify_url = meta[‘external_urls’][‘spotify’]
    album_cover = meta[‘album’][‘images’][0][‘url’]
    track_info = [name, album, artist, spotify_url, album_cover]
    return track_info
We will use the sp.track() function from Spotipy and then access the information we want in the nested dictionary. Let’s save it to a new list and return that list.

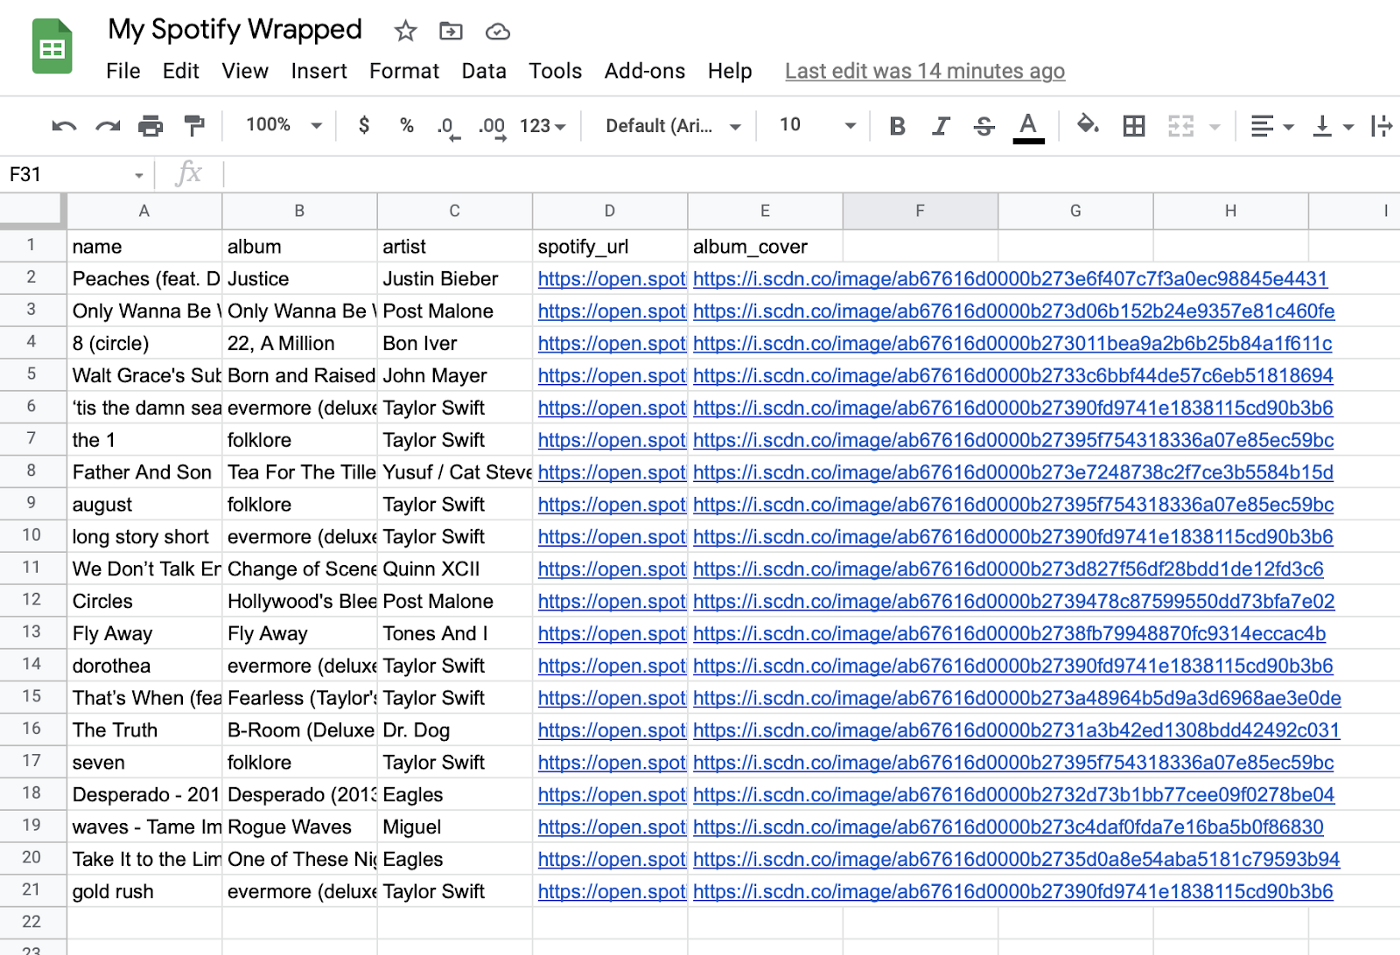
These are going to be the columns that we reference in our google sheet and ultimately our Glide app.
Next up, we need to save this to a dataframe. We will loop over the track ids and run the get_track_features() function for each. Then append it to the empty tracks list. From there we can create a pandas dataframe by passing in the list and giving the column header names we want.
# loop over track ids
tracks = []
for i in range(len(track_ids)):
    time.sleep(.5)
    track = get_track_features(track_ids[i])
    tracks.append(track)

# create dataset
df = pd.DataFrame(tracks, columns = [‘name’, ‘album’, ‘artist’, ‘spotify_url’, ‘album_cover’])
Lovely. We did this in a step-by-step way to make sure it works as expected, but lets now turn it into a function so we can run it on a more regular basis for our app.
def convert_to_df(track_ids):
    # loop over track ids
    tracks = []
    for i in range(len(track_ids)):
    time.sleep(.5)
    track = get_track_features(track_ids[i])
    tracks.append(track)
    # create dataset
    df = pd.DataFrame(tracks, columns = [‘name’, ‘album’, ‘artist’, ‘spotify_url’, ‘album_cover’])
    # save to CSV
    df.to_csv(f’{today}-{time_period}.csv’)
We will pass in a few more pieces of info, like todays date and the time range we want to run this for. This will help us identify specific CSV files if necessary down the road.
Now that we have all the function we need, we can run the function for the various time range parameters that Spotify offers. I’m doing this because in the app we will have three tabs so we can see our Wrapped Playlists over different time periods.
time_ranges = [‘short_term’, ‘medium_term’, ‘long_term’]

for time_period in time_ranges:
    top_tracks = sp.current_user_top_tracks(limit=20, offset=0, time_range=time_period)
    track_ids = getTrackIDs(top_tracks)
    convert_to_df(track_ids)
Cool. We now have all of the CSVs we need. We can import those into the google sheet for Glide now if you want.
Or you can keep reading and we can try and insert the dataframe directly into sheets using the Google Sheets API :)
Inserting Data Into Google Sheets
Let’s rewind a little bit.
Since we have our top tracks in a dataframe, let’s insert that dataframe directly into a Google Sheet instead of saving it out as a CSV and importing that sheet.
We are going to use a python package called gspread to help us. Let’s run through the steps we need to take. Step one is always installing the package.
$ pip install gspreadSimilar to the authentication we did for using the Spotify API, we need to do the same for the Google Sheets API. This will allow our app to access our own spreadsheets through code.
We will use the OAuth client for our needs. Here is a handy link to the gspread documentation. They lay out the steps nicely. I’ll paste them here since we’re lazy and never want to open more links. I’ll add in images too, to make it worth your while.
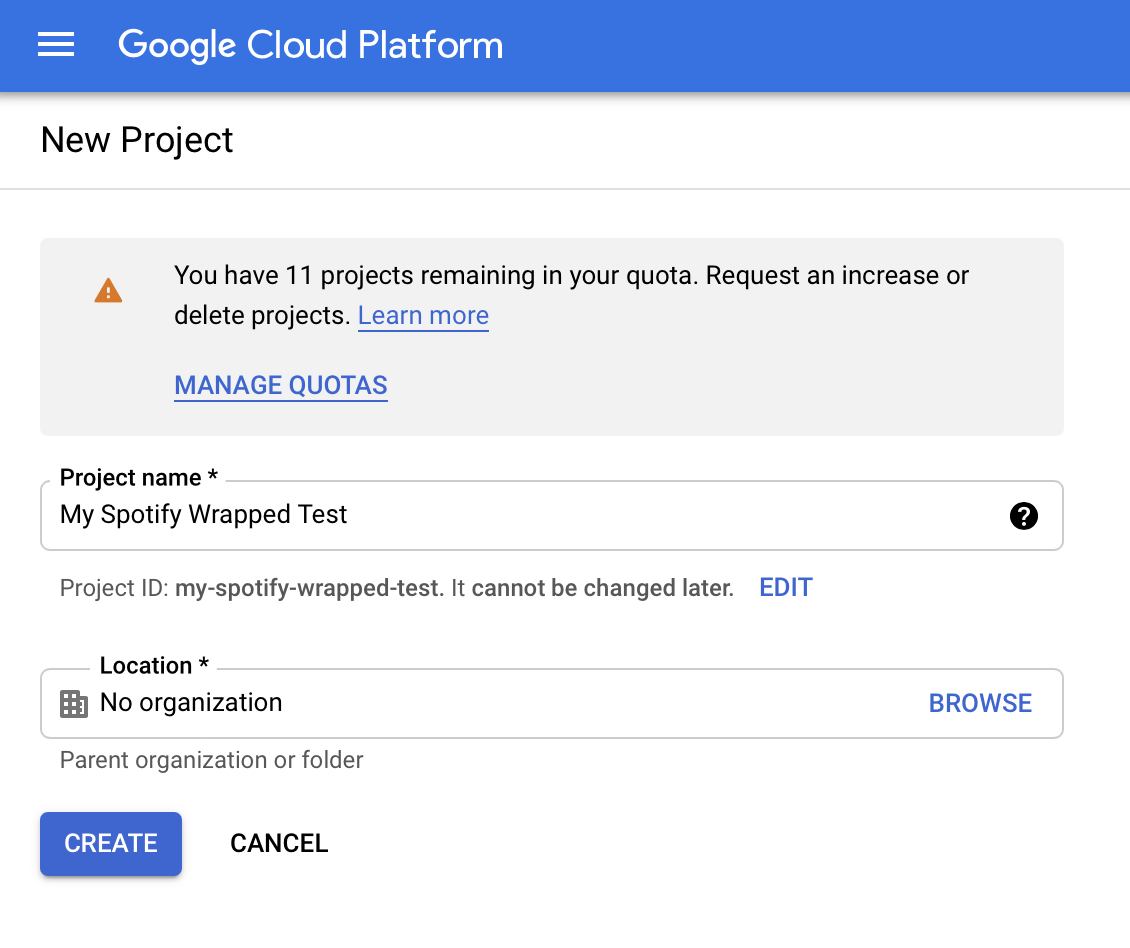
Enable API Access for a Project if you haven’t done it yet. Head to Google Developers Console and create a new project (or select the one you already have).
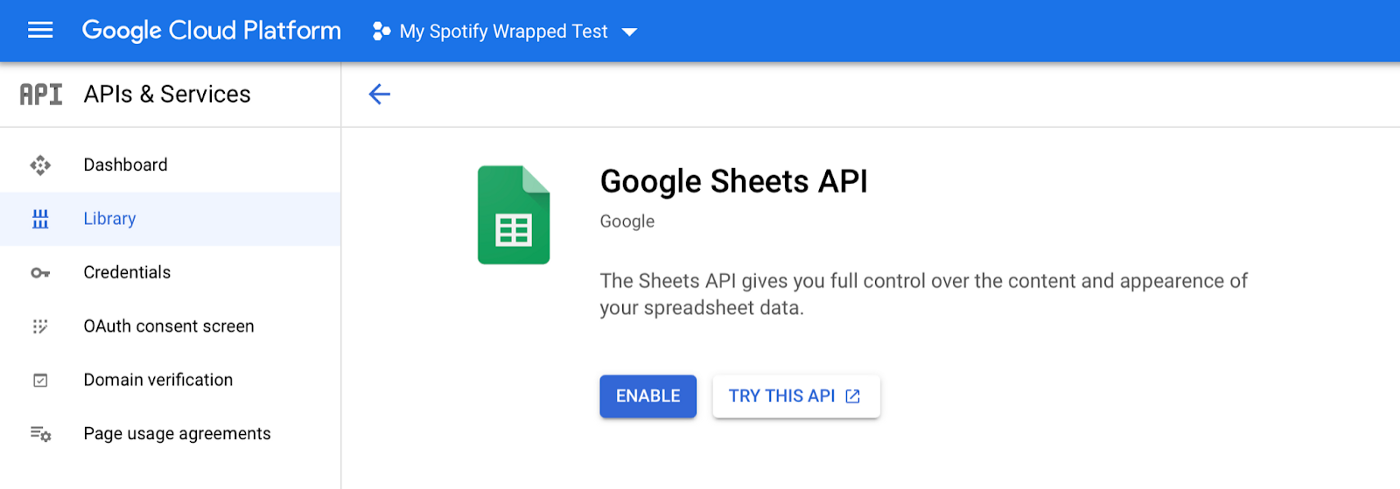
In the box labeled “Search for APIs and Services”, search for “Google Sheets API” and enable it.
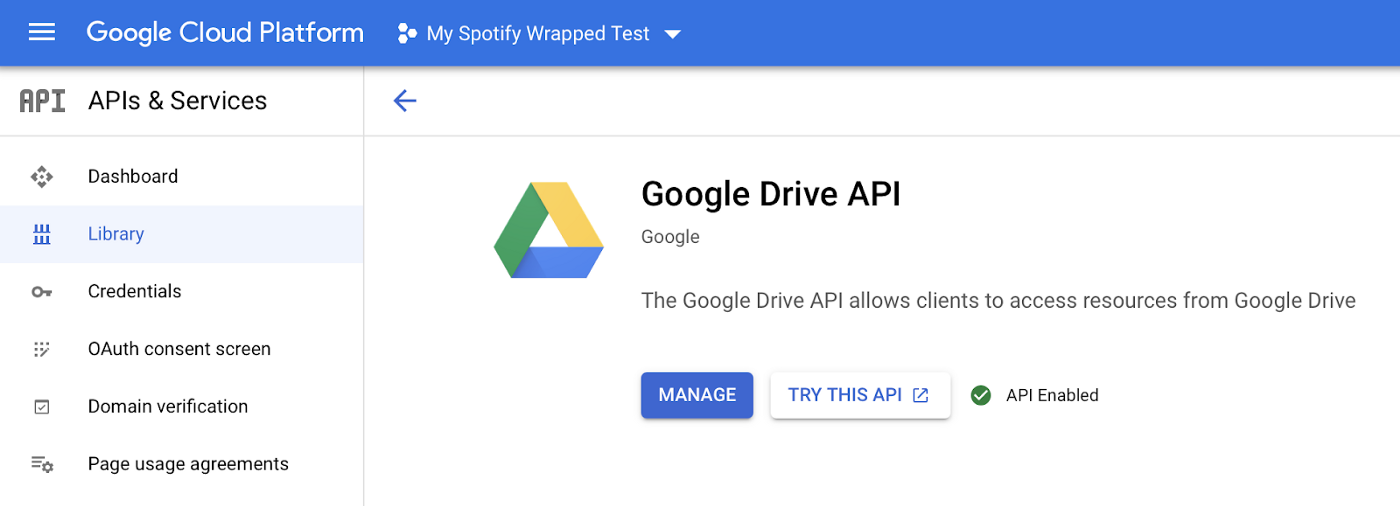
In the box labeled “Search for APIs and Services”, search for “Google Drive API” and enable it.
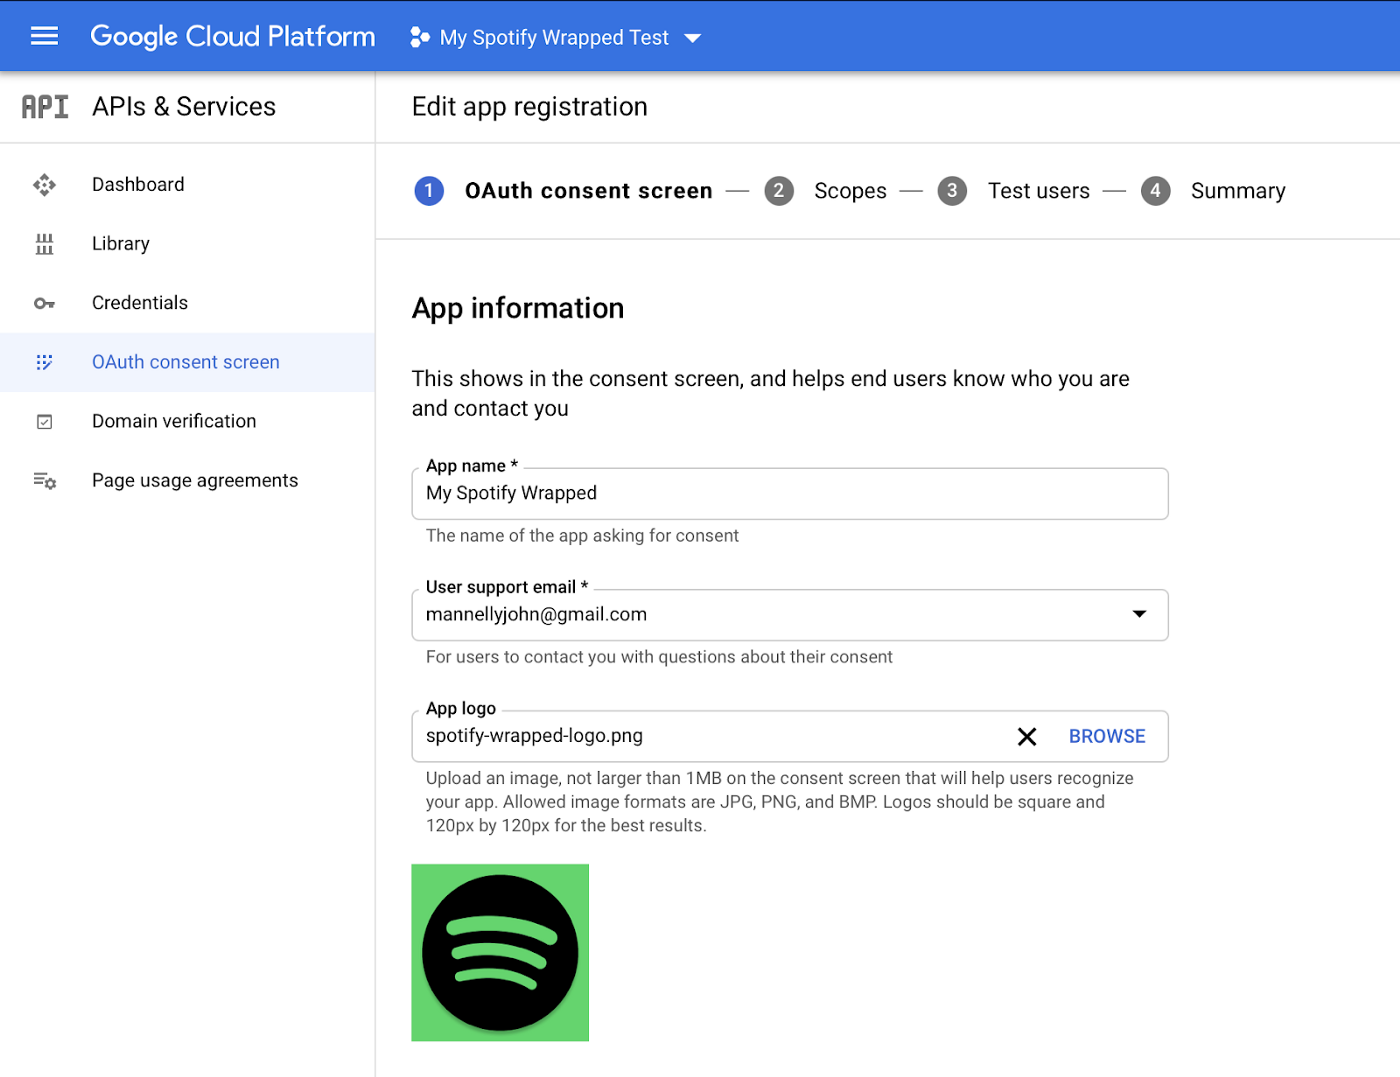
Go to “APIs & Services > OAuth Consent Screen.” Click the button for “Configure Consent Screen” and follow the directions to give your app a name; you don’t need to fill out anything else on that screen. Click Save.
Go to “APIs & Services > Credentials” and choose “Create credentials > Service account key”.
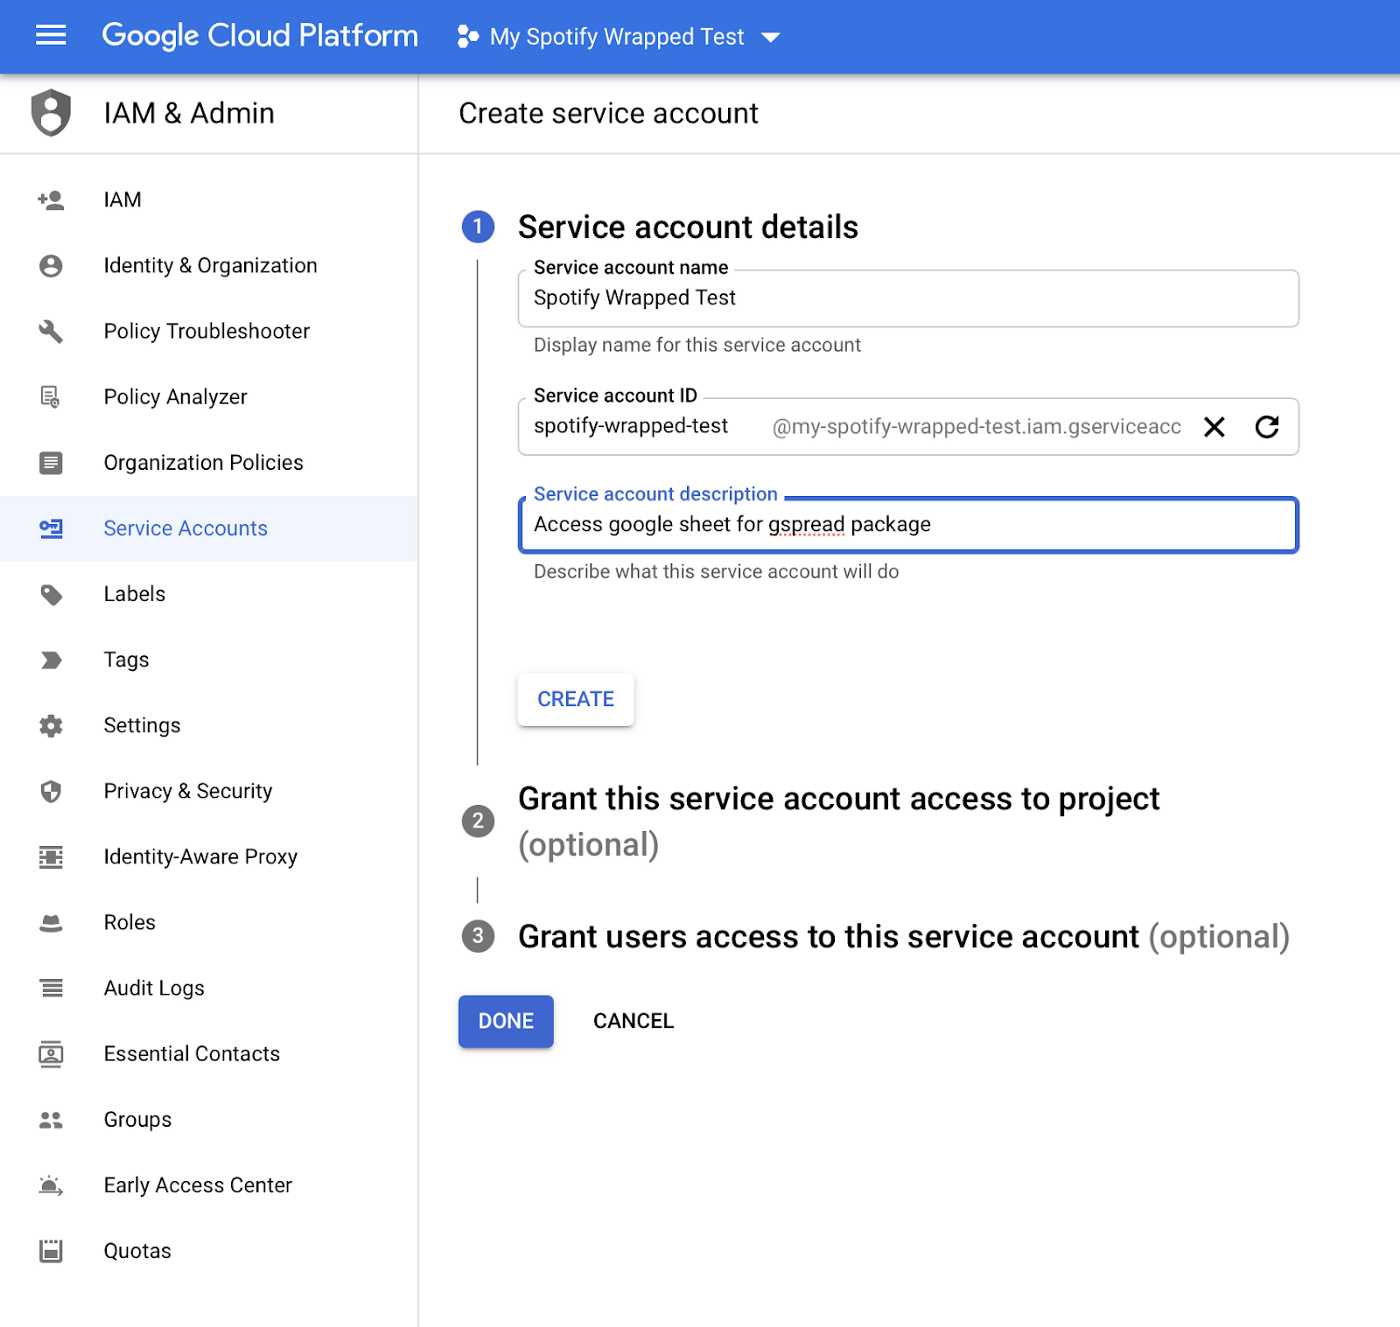
Press “Manage service accounts” above Service Accounts. Press on ⋮ near recenlty created service account and select “Manage keys” and then click on “ADD KEY > Create new key”.
Select JSON key type and press “Create”.
Download the credentials.
You will automatically download a JSON file with credentials. It may look like this:
{
 “type”: “service_account”,
 “project_id”: “api-project-XXX”,
 “private_key_id”: “2cd … ba4”,
 “private_key”: “ — — -BEGIN PRIVATE KEY — — -\nNrDyLw … jINQh/9\n — — -END PRIVATE KEY — — -\n”,
 “client_email”: “473000000000-yoursisdifferent@developer.gserviceaccount.com”,
 “client_id”: “473 … hd.apps.googleusercontent.com”,
 …
}
Remember the path to the downloaded credentials file. Also, in the next step you’ll need the value of client_email from this file.
Very important! Go to your spreadsheet and share it with a client_email from the step above. Just like you do with any other Google account. If you don’t do this, you’ll get a gspread.exceptions.SpreadsheetNotFound exception when trying to access this spreadsheet from your application or a script.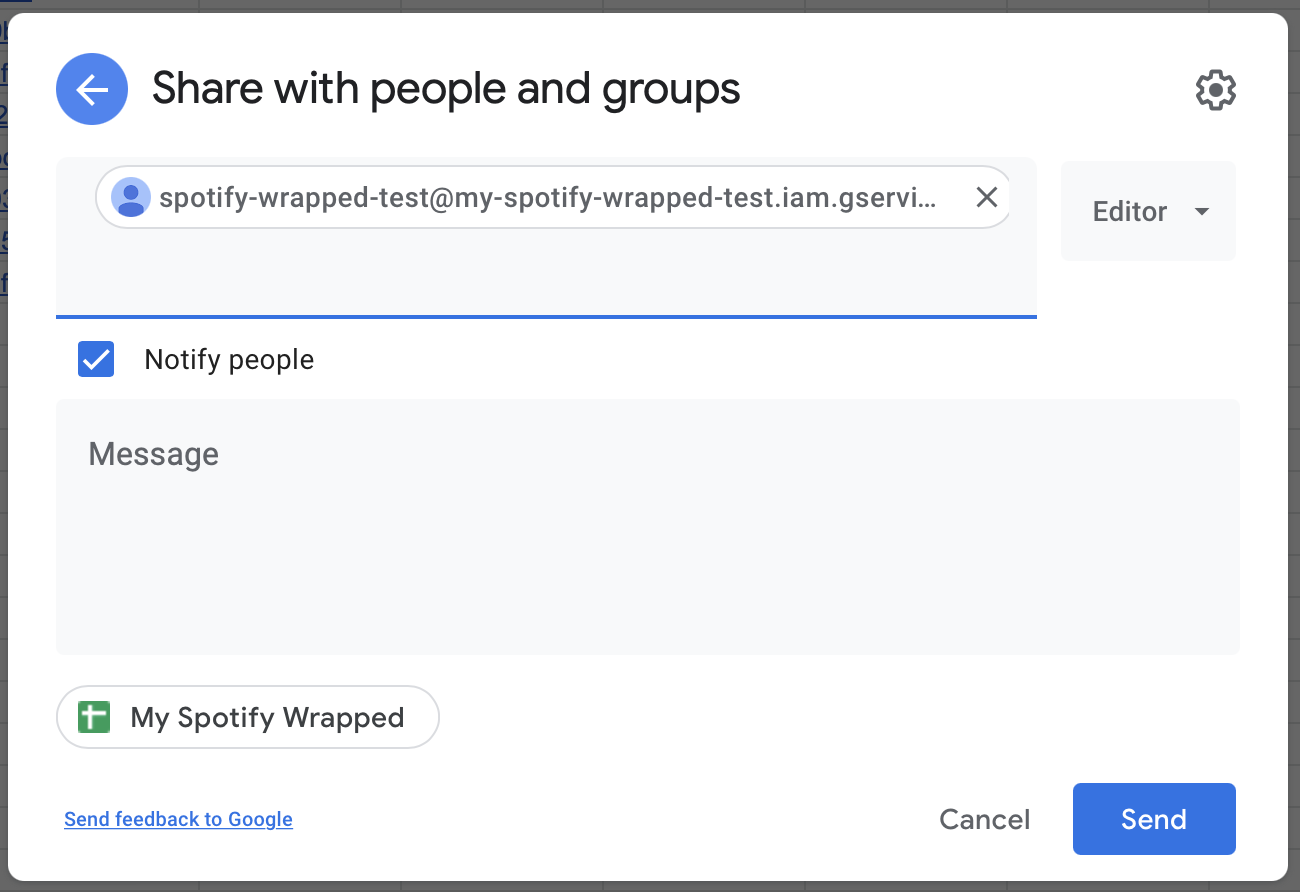
If you want to store the credentials file somewhere else, specify the path to service_account.jsonin service_account():
gc = gspread.service_account(filename=’path/to/the/downloaded/file.json’)Make sure you store the credentials file in a safe place.
Ok back to my own words.
First we need toimport gspread since we installed it with the pip package manager.
$ import gspreadFollowing the gspread documentation, we need to activate the object by calling our json file we just downloaded and stored in our project folder. This file contains our Client ID and Private Key to tell gspread who it is trying to access our Google Sheet.
Since my json was directly in my working directory, I don’t need to add more file path names that look like this on stack overflow path/to/your/file.
gc = gspread.service_account(filename=’my-spotify-wrapped-test-ad510490b281.json’)From there we are using the basic gspread functionality. We open our Sheet by referencing the name of the sheet and the open() function. If you plan on changing the name you can also use the Sheet ID. You grab that in the URL of the sheet.
Once the sheet is opened and saved to our sh object, we want to open the Worksheet, aka Tab. In my sheet I have three tabs with the three time ranges Spotify API offers, short_term, medium_term, and long_term. I named them specifically like this because it will make our lives easier down the road. Trust me.
And for good measure let’s get a specific value in a random cell, then print it to ensure it is working as expected.
sh = gc.open(“My Spotify Wrapped”)
worksheet = sh.worksheet(“short_term”)
val = worksheet.acell(‘B5’).value
print(val)
Now, the good news is gspread has the ability to connect to pandas. So we can insert in the dataframe we created earlier directly into our google sheet using this call:
worksheet.update([df.columns.values.tolist()] + df.values.tolist())What we are going to do is update the function to insert into our google sheet instead of saving to a CSV. That way we can run this every month to update our Spotify Wrapped glide app.
# insert into sheet

def insert_to_gsheet(track_ids):
    # loop over track ids
    tracks = []
    for i in range(len(track_ids)):
    time.sleep(.5)
    track = get_track_features(track_ids[i])
    tracks.append(track)
    # create dataset
    df = pd.DataFrame(tracks, columns = [‘name’, ‘album’, ‘artist’, ‘spotify_url’, ‘album_cover’])
    # insert into google sheet
    gc = gspread.service_account(filename=’my-spotify-wrapped-test-ad510490b281.json’)
    sh = gc.open(‘My Spotify Wrapped’)
    worksheet = sh.worksheet(f’{time_period}’)
    worksheet.update([df.columns.values.tolist()] + df.values.tolist())
    print(‘Done’)
Now if we run it and check our google sheet, we should see our track data there!
Right on. And we can use a for loop to run it for each of the time ranges. We will insert each time range with the appropriate worksheet which conveniently happens to be named the same as the variable. I told you to trust me!
time_ranges = [‘short_term’, ‘medium_term’, ‘long_term’]

for time_period in time_ranges:
    top_tracks = sp.current_user_top_tracks(limit=20, offset=0, time_range=time_period)
    track_ids = get_track_ids(top_tracks)
    insert_to_gsheet(track_ids)
Creating an App With Glide
Now for the fun part. We are going to be using one of the fanciest “No Code” tools out there, Glide.
Glide is an awesome service for rendering apps from a Google sheet. For our use case, we are going to create a Spotify Wrapped app that has three tabs, one for each of the personalized time range.
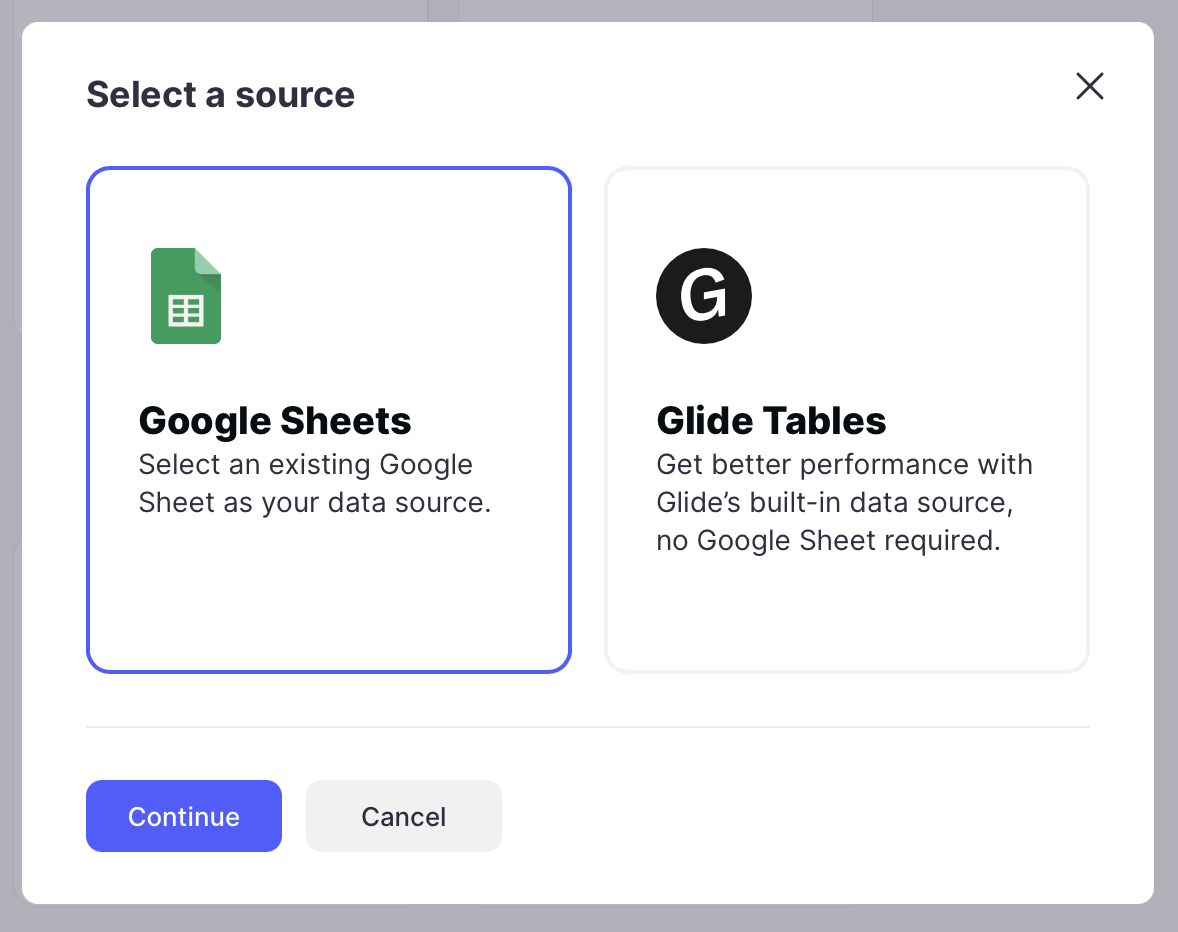
To start, create a Glide account and log in. From your dashboard you will want to create a new app and select Google Sheets at the source.
It will prompt you to sign in and authorize with your google account. We know a little something-something about authorization now!
Make sure to choose your sheet that you dumped all the Spotify data to, likely called “My Spotify Wrapped”. This is the same sheet we referenced with gspread earlier.
After selecting your sheet, it should read in the necessary tabs and provide you with the following smartphone screen.
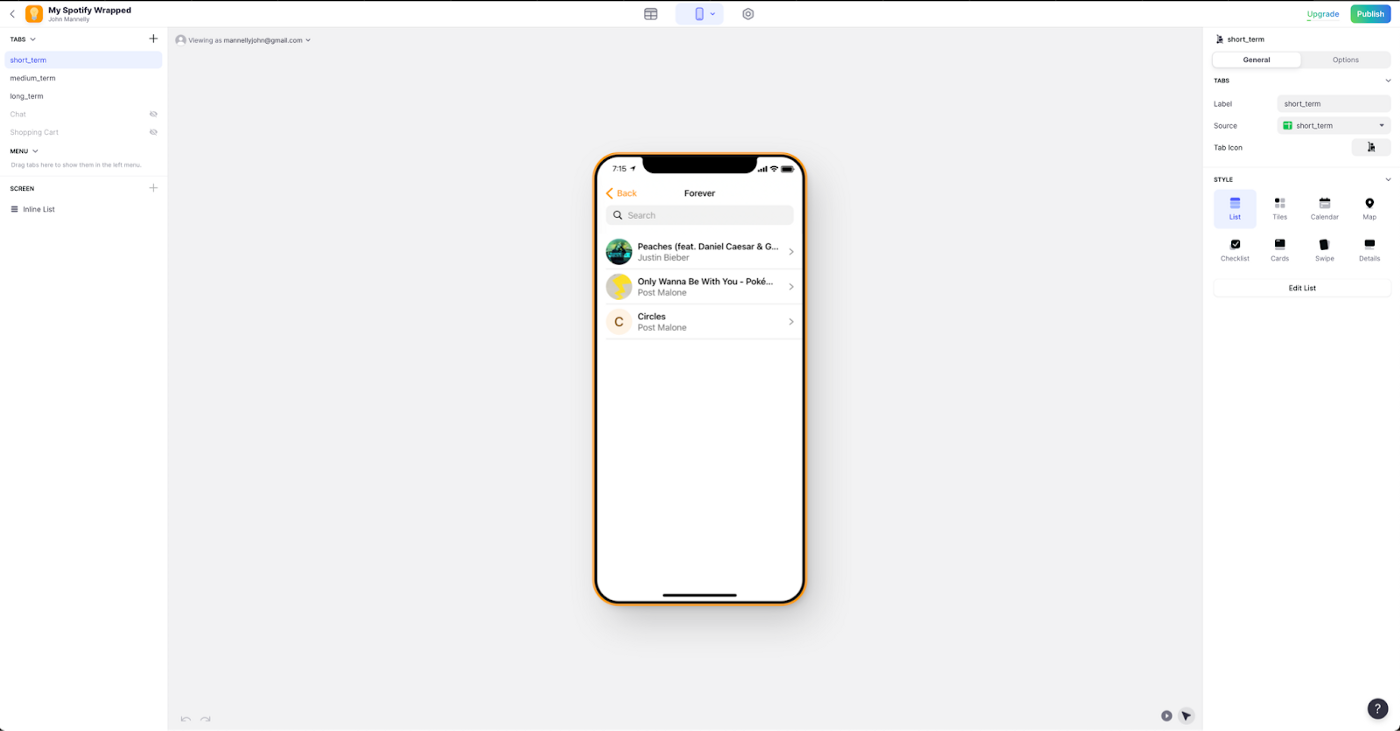
Let’s change the Label of the tab to Recent, update the icon and select Cards style. Make sure the source for Recent is using the short_term tab.
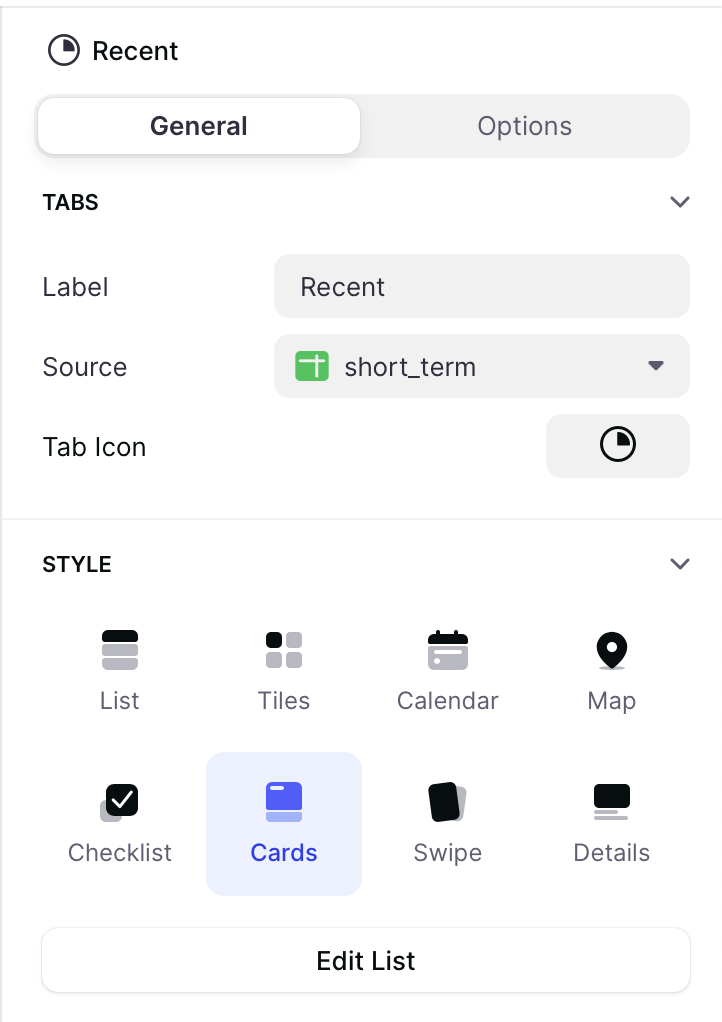
We’ll select Edit List and make the following changes.
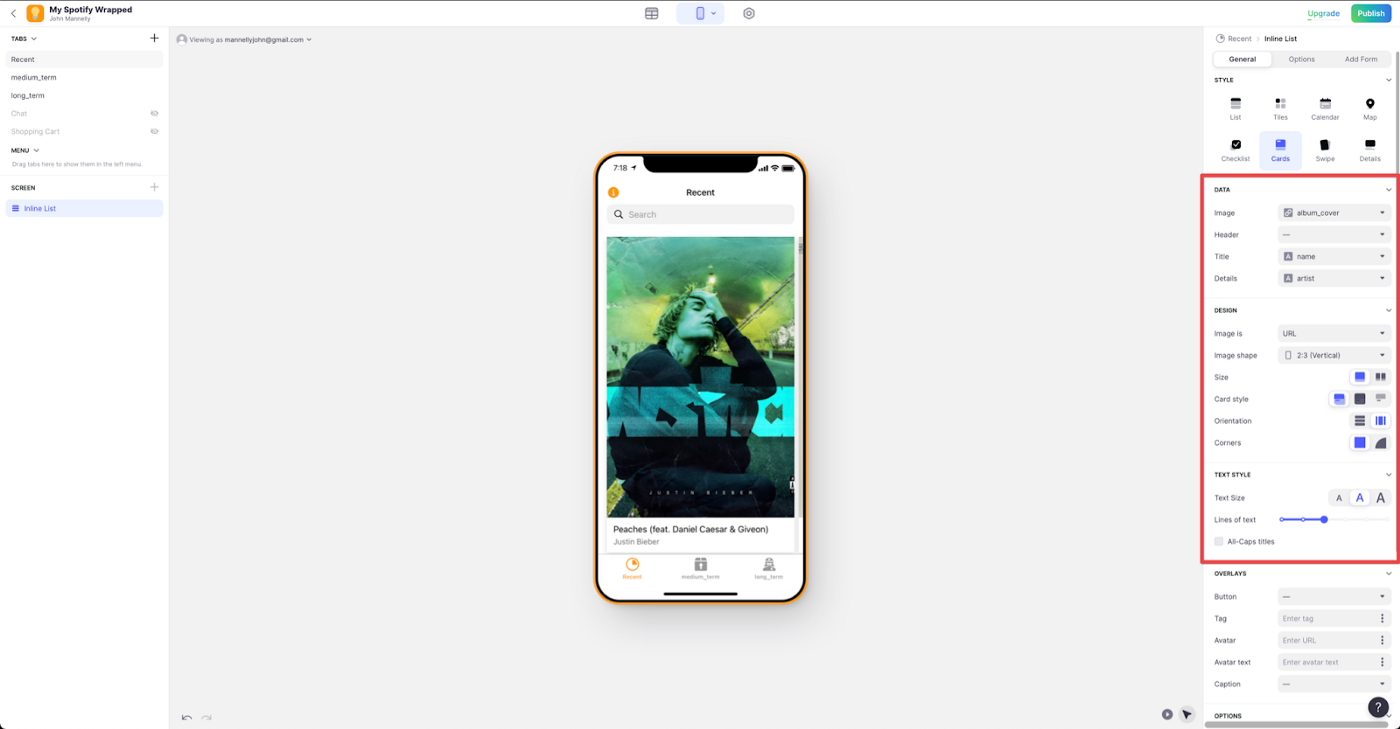
The last part we want to edit on this screen is the Action section. Let’s make it so any tap on the card opens the song in Spotify. We can do this since we are passing through the Spotify URL as part of our track info.

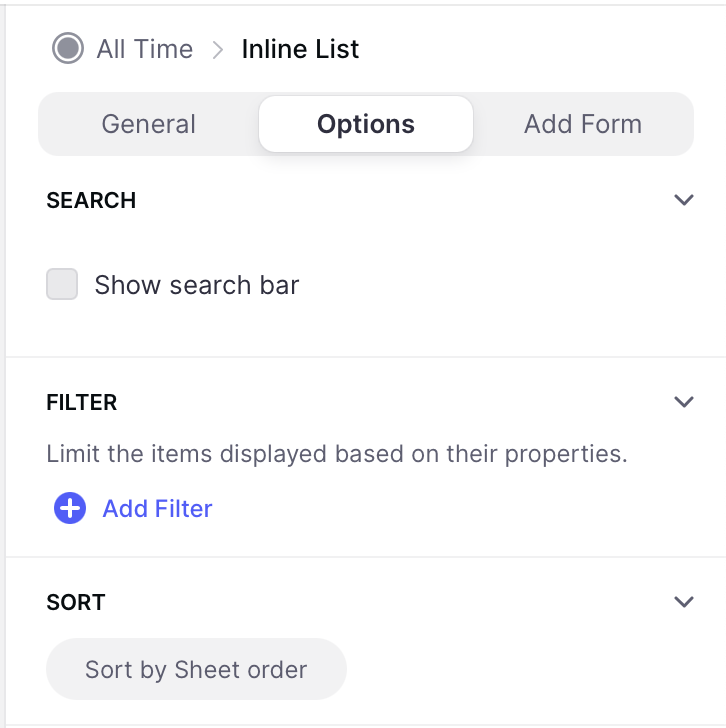
Great. Now rinse and repeat for the medium_term and long_term tabs to create our 6 Months and All Time top tracks. To make it look nice let’s also remove the search bar.
From there you can open up the settings option and beautify your app. I decided to keep the coloring consistent with Spotify brand colors. I am also a sucker for dark mode.
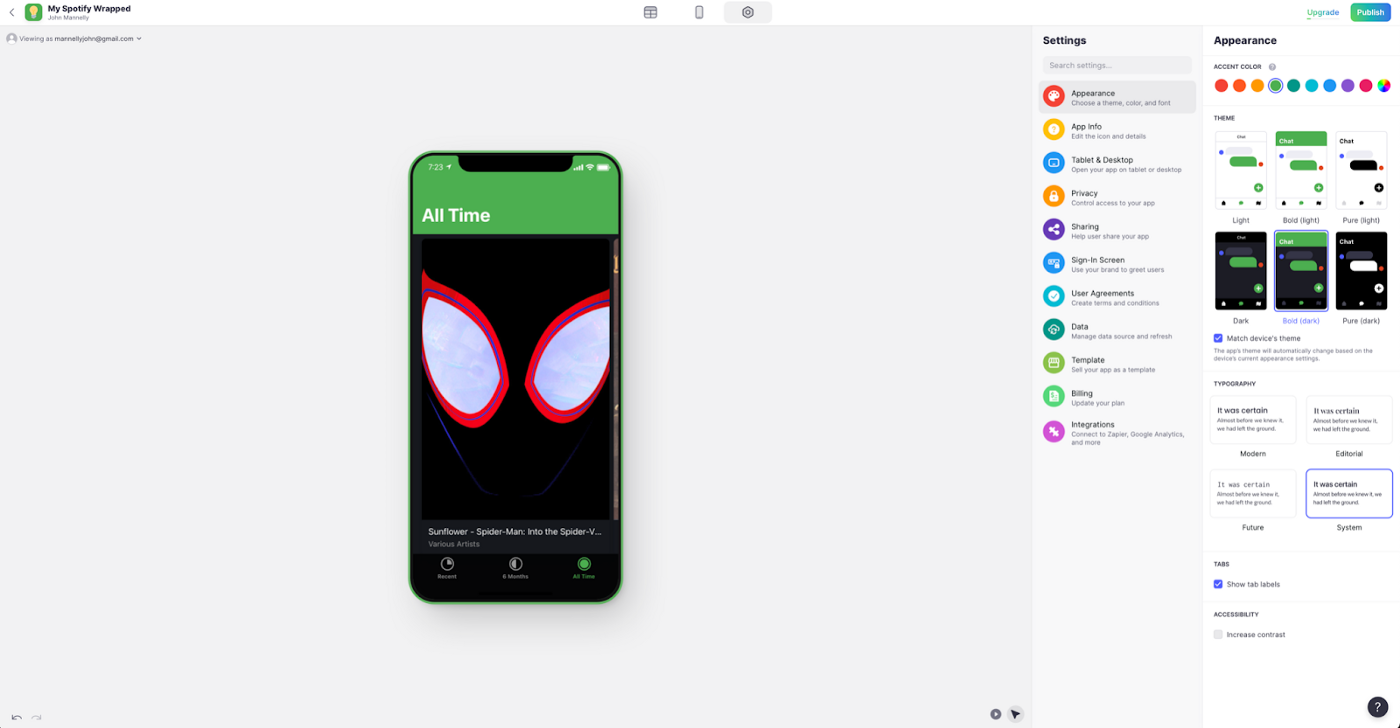
Congratulations. You are ready to hit Publish. After publishing you are given the option to send the link to your phone. From there you will want to add it as a Home Screen app so you can launch it with one click. Go ahead and give it a try!
In future phases I plan to add another section for our top artists.
Wrapping Up
So there you have it. From Spotify API to new Spotify Wrapped app on your phone. Pretty neat huh. If you’re interested in my doing a part 2 to this series, give my YouTube channel a follow. If I get 100 new subscribers I’ll come out with a part 2 that focuses on hosting the service on Heroku and running once a month.
As a special bonus section if you just wanted to skip the Python part and get your access token the easy way, you can use Spotify’s web console to do that. Just fill out the parameters and select get token.

From there you can give it the “user-top-read” permission and request a token.
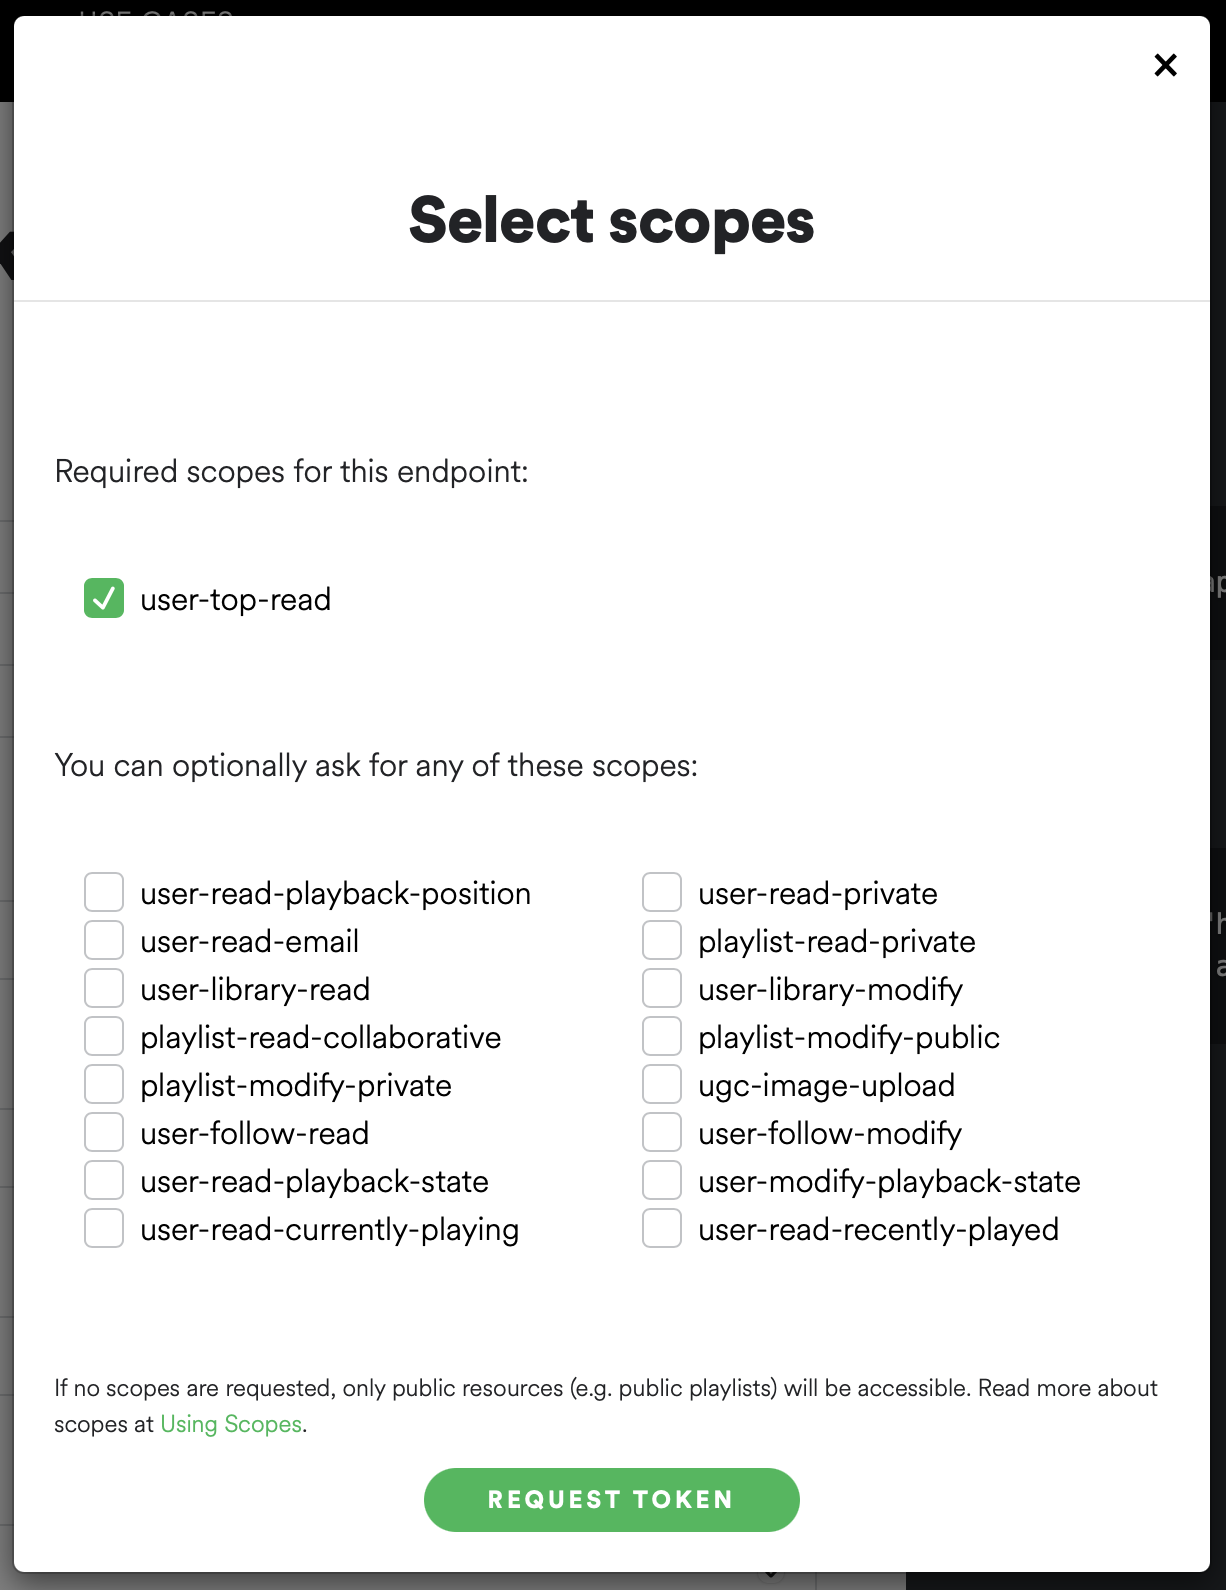
A modal will ask you to log in, at which point it will redirect you back to this site with the access token filled in. Then you Try It and run the query. You’ll see the sample output in your browser on the right, returned in a long json blob.
Hope you enjoyed the tutorial!
Cheers,
Jabe
New posts delivered to your inbox
Get updates whenever I publish something new. If you're not ready to smash subscribe just yet, give me a test drive on Twitter.